14 Fall Garden Cleanup Tips That Double as Decor Prep
The autumn garden cleanup is one of those tasks that gets scheduled and then postponed and then done in a panic before winter. Not because it is particularly difficult. Because it feels purely like removal — taking things away, reducing, ending the season.
What if it was also beginning something?
The autumn cleanup that is also the autumn decoration: these are not two separate tasks. The seed heads left standing are both good garden practice (wildlife habitat, structural interest) and the most beautiful thing in the autumn garden.
The dark mulch applied after clearing is both the soil care task and the design backdrop that makes everything remaining more vivid. The gathered fallen leaves are both the garden’s own compost and the free decoration.
Every task on this list has two functions. Done in the right order with the right intention, the cleanup and the decor prep are the same afternoon.
The Cleanup and Decor Philosophy
Why the garden should be more beautiful after the autumn cleanup, not less:
The conventional approach:
- Clear everything
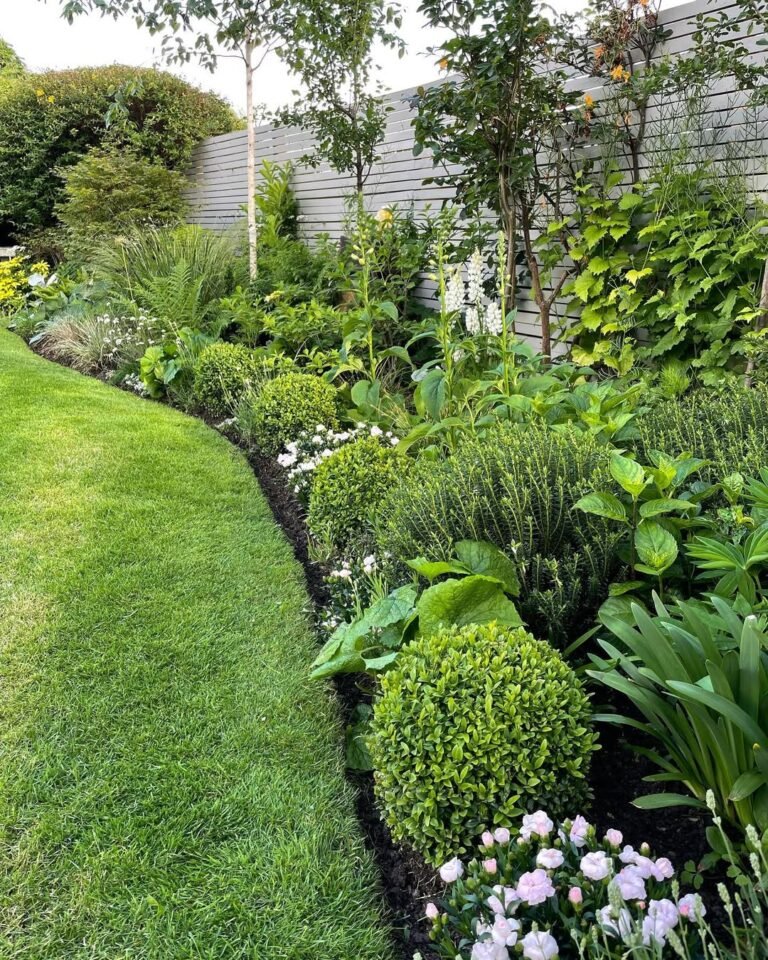
- The garden: bare, brown, uniform
- The cleanup: purely subtractive
- The result: the least beautiful version of the garden
The cleanup-as-decor approach:
- Clear the spent and the dead
- Curate what remains (seed heads, grasses, structural plants)
- Add the materials gathered during cleanup to display arrangements
- The result: the garden more beautiful than before the cleanup began
The two-function checklist:
- Every cleanup task: does it have a decor application?
- The seed heads cut for removal: can they be dried and displayed instead?
- The fallen leaves raked: can some be gathered for wreaths, centrepieces, path decoration?
- The pumpkins from the kitchen garden: can they become the entrance display?
- The answer: almost always yes
The Order of Operations
Why sequence matters:
Do last: cut back the things that will remain as structural winter interest Do first: remove the genuinely spent, diseased, and unattractive During: gather anything that has display potential
The result: the cleanup is targeted, not wholesale. The garden retains its best autumn features. The gathered materials become the decor.
1. The Seed Head Edit (Curate, Don’t Cut)

Assessing each plant’s seed head for winter interest before cutting anything — the cleanup step that transforms the garden from cleared to curated.
Why the seed head assessment comes first:
The instinct to clear:
- Autumn cleanup instinct: cut everything down
- The plants: all looking past their summer best
- The action: the same for the thriving and the spent
The curated alternative:
- Some seed heads: extraordinary in winter light and structure
- Some seed heads: wildlife food sources through winter
- Some seed heads: valuable for indoor display arrangements
- The assessment: takes 20 minutes, changes what the garden looks like from November through February
The seed heads worth keeping:
In the garden (winter structural interest):
- Echinacea (coneflower): the spiky orange-brown cone — birds strip these seeds
- Rudbeckia: similar to echinacea, dark centres
- Phlomis: the whorled seed heads on tall stems — architectural in frost
- Allium: the spherical structures — weathered but still structural
- Teasel (Dipsacus fullonum): the spiky geometric head — the winter garden’s most distinctive form
- Sedums (now Hylotelephium): the flat copper-brown heads — architectural
- Ornamental grasses: the seed plumes — the garden’s most beautiful winter element
Cut for indoor display:
- Honesty (Lunaria): the silver translucent discs after the seed has gone — extraordinary
- Hydrangea: the dried papery heads — the most useful dried flower available
- Chinese lantern (Physalis): the orange paper lanterns — the autumn display plant
- Statice: if grown in the cutting garden — natural dried flower
- Nigella (Love-in-a-mist): the seed pods — the most intricate dried object in any garden
Cut and compost:
- Blackened, collapsed, or diseased stems
- Annual plants that are genuinely finished
- The plants with no structural interest remaining
The editing process:
Walk through with three intentions:
- Leave: everything with structural interest or wildlife value
- Cut for display: everything with indoor display potential (in a trug or bucket)
- Cut for compost: everything genuinely spent
The result: a garden that is edited rather than stripped. The remaining plants: specifically the beautiful ones. The cleared spaces: the contrast that makes what remains more visible.
Cost breakdown:
- Bypass secateurs: already owned
- A trug for gathering display material: $0–20
- Total: $0–20
The seed head edit done: the garden in November is better than the garden in October. The remaining plants: specifically selected for their winter quality.
Seed Head Tips
The diseased material:
- Any stem showing signs of fungal disease (black spot, rust, powdery mildew): cut and bin (not composted)
- The disease overwintering in the garden: the source of next year’s outbreak
- The removal: the most important health task in the autumn cleanup
The hollow stem:
- Some garden stems (particularly those of umbellifer plants): hollow
- Hollow stems: nesting sites for solitary bees
- These can be cut to 12 inches and bundled as insect hotels
- Or left standing where they are
2. The Dark Mulch Application (The Backdrop and the Soil)
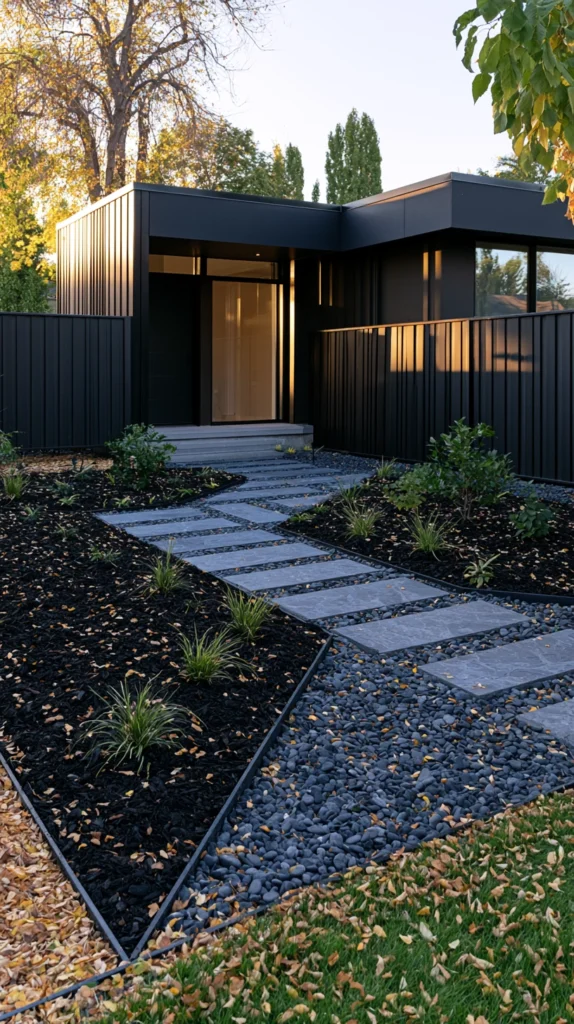
Applying fresh dark bark mulch to all cleared borders — the task that simultaneously improves the soil and transforms the garden’s visual quality.
Why mulching is the cleanup task with the most visual impact:
The freshly cleared border:
- After cutting back: bare soil exposed
- Bare soil: looks uncared for regardless of what surrounds it
- The garden: cleared but not finished
Fresh dark bark mulch:
- Applied over the cleared soil: 2–3 inches deep
- The dark surface: the backdrop against which everything remaining reads
- The remaining seed heads and plants: more vivid against dark mulch than against bare soil
- The path edges: defined by the mulch
- The garden: finished rather than cleared
The soil benefit:
What mulch does:
- Suppresses weeds (the mulch: the weed prevention for the next six months)
- Retains moisture
- Insulates the soil (the root systems of perennials: protected from hard frost)
- Breaks down over winter: improving the soil structure
- Feeds the worms (the worms: bringing the broken-down mulch into the soil)
The dark colour specifically:
Why dark mulch:
- Pale wood chip: does not create the visual backdrop
- Dark composted bark: the correct material
- Against dark mulch: the copper of the remaining grasses, the purple of the kale, the silver of the seed heads — all more vivid
- The dark backdrop: the design decision as well as the garden care task
The application:
Around (not on top of) the remaining plants:
- 4-inch clearance from any plant stem
- The mulch: around the plants, not smothering them
- The stems: visible, the mulch: the ground between
2–3 inch depth:
- Less than 2 inches: insufficient for weed suppression
- More than 4 inches: can cause issues with some plants
- The depth: consistent throughout the border
The visual once applied:
Before mulch: cleared border with bare soil and some remaining plants After mulch: a deep, dark, deliberate-looking border in which the remaining plants are displayed as if curated
The most important single task in the autumn cleanup for visual impact.
Cost breakdown:
- Dark bark mulch (per cubic yard): $40–60
- Delivery (if needed): $40–60
- Total: $40–120 depending on garden size
3. The Ornamental Grass Edit (Cut, But Not All the Way Down)

Leaving ornamental grasses standing through autumn and winter — the most important structural decision in the autumn cleanup.
Why grasses are the worst thing to cut down in autumn:
The autumn grass:
- September: the grasses at peak
- The seed plumes: fully developed, amber-gold
- The low afternoon light: backlighting the plumes
- The wind: moving the plumes continuously
- The grasses in October: the most beautiful the garden gets all year
The winter grass:
- The plumes: remaining through November, December, January
- Frosted: extraordinary (the frost on the fine plume filaments: a garden photograph)
- The structure: standing when nothing else does
- The grasses in January: the garden’s only movement and interest
The cut decision:
When to cut:
- February: the standard advice
- The reasons: before the new growth begins (if cut too late, the new shoots are damaged)
- The January-cut: acceptable if the plumes have completely collapsed
- October or November: too early — the most beautiful months still ahead
How to cut:
- Cut to 6–8 inches (not to the ground)
- The remaining stumps: protect the crown from frost
- The cut material: the abundance of dried grass for display (the largest harvest of display material from any autumn task)
The display material from grass-cutting:
The cut plumes:
- Gathered into large bundles
- Tied with twine
- In a large vessel: dried grasses in an oversized vase or basket
- The most dramatic and free display material available in any autumn garden
One large stem of miscanthus: taller than a person, the plume at head height, displayed in a floor-standing vessel — the most extraordinary single piece of autumn decor from any garden.
Cost breakdown:
- No cost: the cut is from plants already growing
- Large vessel for the display material: $0–30
- Total: $0–30
4. The Leaf Gathering and Sorting (The Free Decor Harvest)
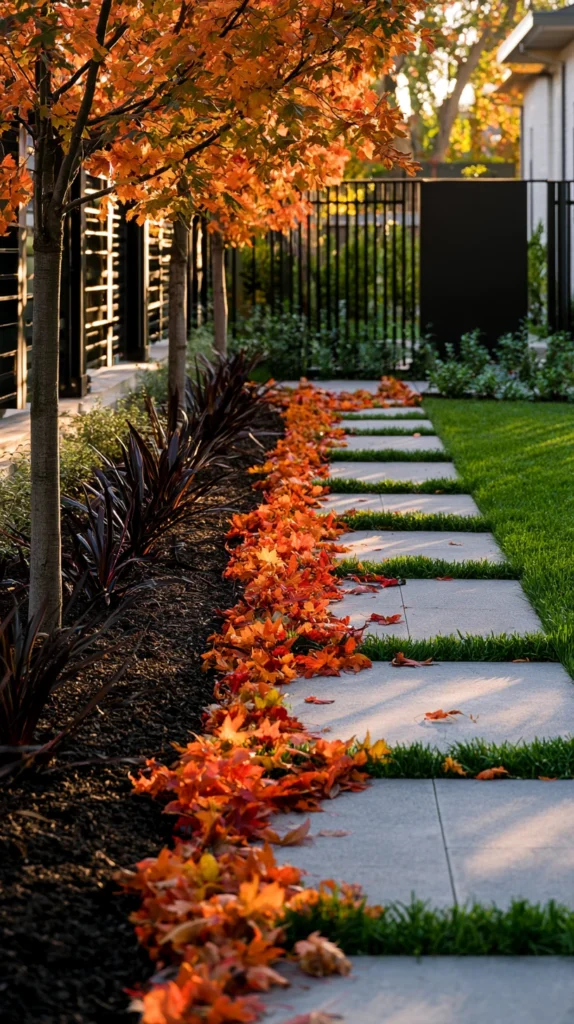
Gathering fallen leaves with display intention — the cleanup task that produces the most free decor material of any autumn activity.
Why leaves are the autumn garden’s most undervalued resource:
The fallen leaf:
- Conventionally: cleared and composted or binned
- The well-designed autumn garden: the fallen leaf as a resource
- Three uses: compost (the soil), mulch (the beds), display (the decoration)
- The task of clearing: producing material for all three
The three-pile sort:
Pile one — leaf mould (the compost):
- All leaves: suitable for leaf mould
- Bags or a wire bin: filled and left for one year
- The result: the finest soil conditioner available for free
- The leaf mould: applied as the following year’s mulch
Pile two — path and border decoration:
- The best leaves (largest, most colourful, most interesting)
- Kept separately
- Used as described in the path decoration article (arranged along edges, at focal points)
- The deliberate scatter: the path decoration that is also the garden cleanup
Pile three — display material:
- The most beautiful leaves pressed flat between books
- Leaves with interesting shape (maple, oak, liquidambar)
- The colours at peak: deep red, gold, copper
- Pressed for wreaths, for table settings, for place cards, for centrepieces
- The pressed leaf: the most versatile free autumn decoration
The pressing method:
Between books:
- Lay the leaves flat between sheets of newspaper
- Place heavy books on top
- One to two weeks: fully pressed
- The result: flat, preserved, retaining much of the colour
- Pressed leaves used for: table settings, centrepieces, wall displays, cards and notes
The display use:
Pressed leaves on a table:
- The Thanksgiving table (continuing the theme from the earlier article)
- A pressed leaf at each place setting
- Or: a runner of pressed leaves down the table centre
- The pressed leaf as name card: the person’s name written on the leaf with a fine pen
- Free, seasonal, and genuinely beautiful
Cost breakdown:
- The leaves: $0
- Heavy books for pressing: already owned
- Total: $0
5. The Dying Annuals Removal (The Clear for Display)
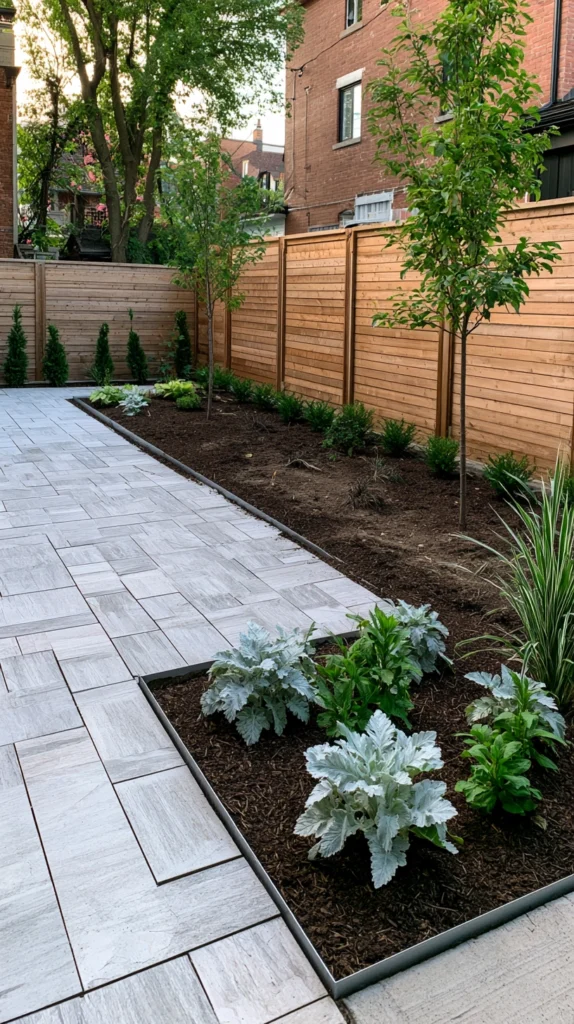
Removing spent annual plants cleanly and using the cleared space for autumn display — the cleanup that creates the stage for the decor.
Why removing annuals creates opportunity:
The spent annual:
- Petunias, begonias, marigolds: done after the first frost
- Black and collapsed: the visual ending of summer
- Removed immediately: the border clean and defined
The cleared space:
The cleared annual bed after removal:
- The edging: visible and crisp
- The soil: ready to mulch
- The space: available for autumn display containers
- The cleared annual border: not emptied — freed for autumn use
The transition plantings:
Into the cleared annual space:
- Ornamental kale and cabbage (see Idea #3 from the fall container article)
- Cyclamen hederifolium
- Winter heather
- The autumn pot moved into the cleared space: the annual space becoming the autumn display space
This is not the same bed — it is the same footprint used for a different season’s display.
The annual removal technique:
The root:
- Pull the plant (roots and all) where possible
- The roots left in the ground: composting in place (acceptable for healthy plants)
- The diseased plants: removed with roots, binned
The annual detritus:
- The collapsed foliage of spent annuals: the opposite of the seed head — no display value
- Straight to the compost (if disease-free)
- The bin (if diseased)
Cost breakdown:
- Replacement autumn plants (for the cleared space): $20–40
- Total: $20–40
6. The Compost Setup (The Decor Material Storage)
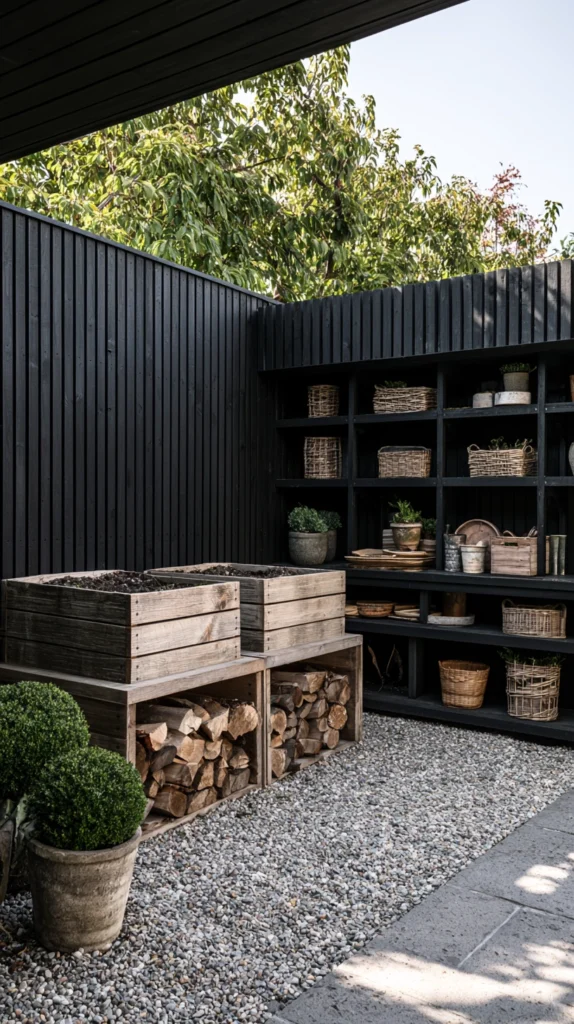
Setting up or refreshing the compost system — the cleanup infrastructure that stores all the material gathered, and produces the garden’s free fertility.
Why compost is a decor-connected task:
The display materials not used immediately:
- Seed heads gathered for display
- Fallen leaves not yet pressed
- Dried botanical materials from the cutting garden
- All stored: the compost area is the autumn harvest staging area
The compost system:
Three bins (the efficient system):
- Bin one: actively filling (the current season’s material)
- Bin two: maturing (last season’s material)
- Bin three: finished compost ready to use
In a small garden:
- One or two bins
- Or: a simple heap (less efficient but functional)
- The leaf mould bags: separate from the general compost (leaves are better composted alone)
The autumn fill:
What goes in:
- Spent annuals (disease-free)
- Soft herbaceous stems (not woody)
- Vegetable garden debris
- Fallen leaves (or bagged separately for leaf mould)
- Kitchen vegetable peelings
What does not go in:
- Perennial weeds (they re-seed from the compost)
- Diseased plant material
- Woody stems (they take too long to break down — chip separately)
- Meat or cooked food (attracts pests)
The turning:
Autumn: the ideal turning time:
- Mix the layers
- Add water if the heap is dry
- The turning: accelerates decomposition
- The compost from the bottom: possibly ready to use now (spread on the cleared beds)
Cost breakdown:
- Compost bins (if not owned): $30–60
- No other cost (the material: from the garden)
- Total: $0–60
7. The Perennial Cutback (The Timing Decision)

Deciding what to cut now and what to leave — the most important timing decision in the autumn cleanup — the task that determines the garden’s winter appearance.
The two positions:
The “cut everything” school:
- Clear all perennials in autumn
- The garden: tidy and defined
- The borders: clean
- The advantage: the garden is done for the year
The “leave it” school:
- Leave all perennial stems through winter
- The structural interest: maintained
- The wildlife: fed and sheltered
- The disadvantage: the garden looks “messy” to some eyes
The curated middle ground:
Cut now:
- Any perennial that has genuinely collapsed (no structural interest)
- Any diseased stems (the health priority)
- Anything unsightly from a position visible from the house or from the street
Leave until February:
- Everything with structural seed heads (as assessed in Task #1)
- All ornamental grasses
- The hollow-stemmed plants (insect habitat)
- Anything still being used by birds
The practical guide:
Cut now or leave: the decision tree:
- Does it have a structural seed head? → Leave
- Is it a grass? → Leave until February
- Is it diseased? → Cut and bin
- Is it completely collapsed with no remaining form? → Cut and compost
- Is it a hollow-stemmed plant? → Leave (or cut to 12 inches as an insect hotel)
The cutting height:
For perennials being cut now:
- 4–6 inches above the ground
- Not to the ground (the crown: vulnerable)
- The remaining stub: also structural at this height (the row of cut stubs: tidy)
The collected cuttings:
The display material from perennial cutback:
- Any stems with decorative interest: gathered
- The dried rudbeckia stems (still with seed heads): used in arrangements
- The dried seed stalks of fennel (feathery): the table display material
- The collected material: the decor from the cleanup
Cost breakdown:
- No additional cost
- Time: varies significantly by garden size
- Total: $0
8. The Garden Structure Refresh (Paint and Repair Before Winter)

Refreshing the paint or stain on garden structures during the cleanup — the maintenance task that is also the visual refresh.
Why autumn is the ideal time for structure maintenance:
The timing:
- Autumn: after the summer heat, before winter wet
- The wood: dry enough to accept paint or stain
- The garden: in the cleanup phase (disruption already happening)
- The maintenance: done at the natural disruption point rather than requiring a separate project
What to do:
The fence:
- Inspect for damage (loose boards, rotted bases)
- Clean (pressure wash or scrub)
- Allow to dry (48 hours minimum)
- Apply solid colour stain or exterior paint
- The autumn maintenance: the fence carrying its design role through the year
The dark fence in autumn:
- Already covered in multiple articles: the dark fence as the garden’s backdrop
- The autumn cleanup: the time to do this if not done yet
- The dark fence after cleaning: the most impactful visual change of the autumn garden
The garden structures:
- Pergola (if timber): inspect and re-stain
- Raised bed edging: repair any broken sections
- Gate: oil the hinges, adjust if needed
- Shed: inspect roof and walls, treat any problem areas
The garden furniture:
Autumn furniture care:
- Teak: wash and optionally oil (or leave to silver — both are correct)
- Metal: check for rust, sand and touch up if needed
- Cushions: brought inside for winter or stored in a deck box
- The furniture: maintained as the season ends, ready for next spring
The visual result:
A freshly painted fence and maintained structures:
- The cleanup complete
- The structures refreshed
- The garden: ready for the display elements to be added
- The backdrop: prepared before the decor
Cost breakdown:
- Solid colour exterior stain (1 gallon): $25–35
- Paint brushes: $5–10
- Total: $30–45
9. The Autumn Harvest Display Staging (Using the Harvest as Decor)

Using the vegetables and fruit from the autumn harvest as the garden’s primary decor element — the cleanup task (harvesting) that is also the decor setup.
Why the harvest IS the autumn decor:
The autumn garden harvest:
- Pumpkins: harvest before first hard frost
- Winter squash: harvest when the stem dries
- Ornamental gourds: harvest at the same time
- Late apples: harvest and display
- Dried corn: left to dry on the stalks
- These: the harvest and the decoration simultaneously
The staging:
The entrance display (from the pumpkin article):
- The harvested pumpkins: moved to the entrance area
- The crates and barrels (from garden storage): the display structure
- The harvest material: the display material
The harvest basket:
- A wooden trug or wicker basket
- Filled with the harvest: pumpkins, squash, apples, dried corn
- Placed at the entrance to the garden or beside the door
- The harvest display: the most honest autumn decoration
The garden table centrepiece:
- The late apples in a bowl
- Three small pumpkins of varied sizes grouped beside
- Dried grasses from the garden (Task #3) at the back
- The outdoor table: the harvest display rather than a bought arrangement
From the kitchen garden cleanup:
- Pull spent plants: this is the harvest-and-cleanup moment
- The root vegetables left in the ground (see the autumn vegetable article): harvest what is wanted for display, leave the rest
- The dried bean pods: left on the plants until fully dry, then harvested as stored beans
- The dried bean plant: the display element before it is cleared
Cost breakdown:
- The harvest: from what is already growing
- Trug or basket (if not owned): $15–25
- Total: $0–25
10. The Border Edge Restoration (The Definition That Makes Everything Else Work)
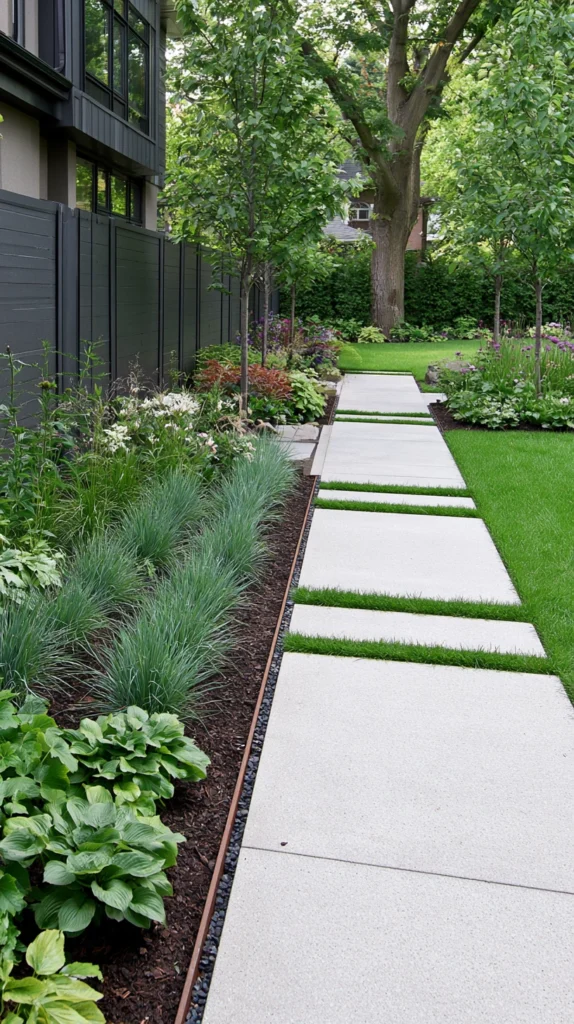
Re-cutting and defining all border edges after the cleanup — the task that gives the cleaned garden its composed, deliberate quality.
Why the edge is the cleanup’s finishing touch:
The cleaned border without defined edges:
- The cleanup: done
- The border: cleared and mulched
- The edge between lawn and border: vague, undefined
- The garden: cleaned but not composed
The cleaned border with defined edges:
- A crisp edge between the lawn and the border
- The border: has a beginning and an end
- The lawn: clearly the lawn (not the border’s edge)
- The garden: cleaned and composed
The edge as design:
The crispness of the edge:
- More visual impact than any plant choice
- The edged border: reads as designed
- The un-edged border: reads as accidental
- The edge: the invisible design decision that makes the visible design work
The tools:
The half-moon edger:
- The best tool for redefining an edge after an overgrown period
- Cuts a clean, deep edge
- One person’s work: one afternoon for a standard garden
- The result: immediate and significant
The string trimmer (edged vertically):
- Faster than the half-moon edger for long, established edges
- Less precise
- The combination: half-moon for the restoration, string trimmer for the maintenance
The cut material:
From the edge cutting:
- A row of small turves and soil: cleared from the edge
- This material: composted
- Or: used as top-dressing for bare soil areas
The path edge:
Paths and borders:
- The edge between the path and the border: equally important
- The bark chip path defined against the border
- A steel edging strip: makes this permanent (installed during the cleanup if not already)
Cost breakdown:
- Half-moon edger (if not owned): $25–40
- Time: 2–4 hours depending on garden size
- Total: $0–40
11. The Cutting Garden Harvest and Reset (The Display Material Abundance)
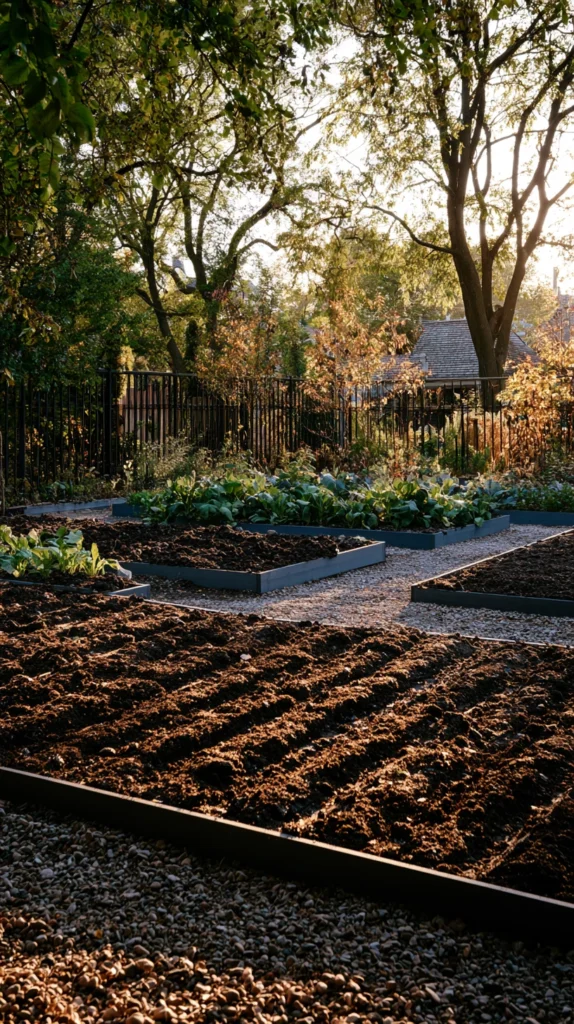
Harvesting all remaining cutting garden material and resetting the beds for next year — the cleanup that produces the most indoor display material of any garden task.
Why the cutting garden cleanup is the richest decor-prep task:
The cutting garden in autumn:
- Zinnias: still flowering (until frost)
- Dahlias: still flowering until hard frost
- Statice: dried on the stems
- Cosmos: finishing
- Honesty: seed pods fully formed and ready to strip
- Nigella: seed pods fully formed
- Physalis: the lanterns ready
The autumn harvest:
Before any clearing:
- Every useable stem: cut and gathered
- The last zinnias: the autumn bouquet
- The last dahlias: the final harvest
- The dried statice: straight into the display bundle
- The dried seed heads: cut and bundled
- The honesty: stripped to reveal the silver discs
The honesty (Lunaria) harvest:
Preparing honesty for display:
- The seed pods: two outer layers of brown papery covering
- Gently peel back the outer layers (they strip away cleanly)
- The silver inner membrane: revealed
- Extraordinary translucent silver discs on branching stems
- The most beautiful dried plant material from any garden
- Used in wreaths, in arrangements, in any autumn display
The resetting:
After harvesting:
- Remove spent stalks and roots (annuals: entirely removed)
- Prepare beds for bulbs (if winter or spring bulbs are going in)
- Apply compost over the cleared surface
- The cutting garden: reset for next season from the autumn cleanup
The bulb planting:
Into the cleared cutting garden:
- Spring bulbs: the next season’s cutting garden beginning
- Tulips (for the cutting garden: many rather than few — they are harvested before they can be appreciated in the ground)
- Narcissus: the spring cut flower supply
- Alliums: the late spring cut flower
- The cleared beds: the opportunity to plant next year’s harvest
Cost breakdown:
- Spring bulbs (for cutting garden): $20–40
- The cutting garden reset materials: $0
- Total: $20–40
12. The Compost Pile Arrangement (The Productive Corner)
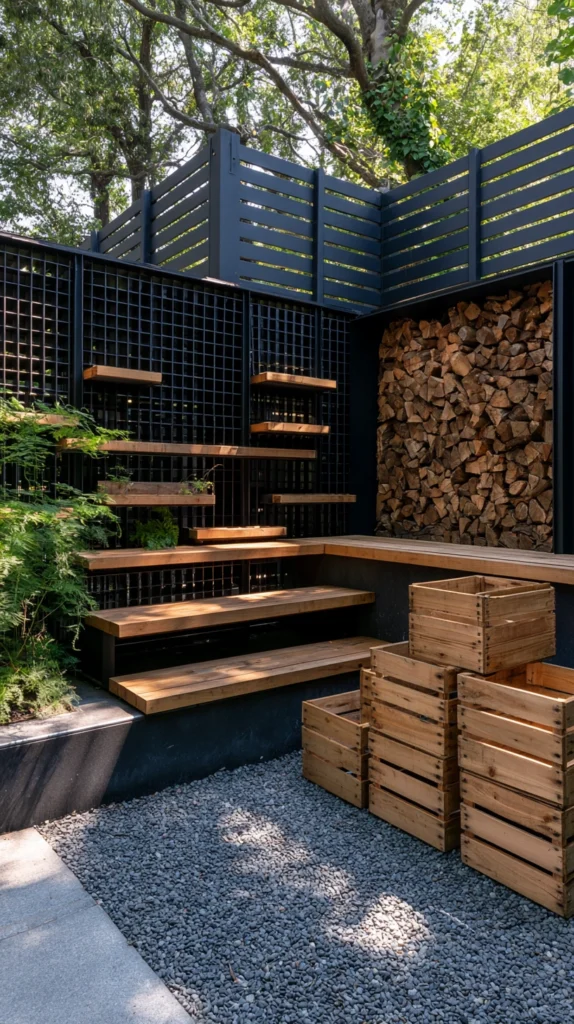
Making the compost area as organised and presentable as any other garden feature — the cleanup that makes the working part of the garden as considered as the decorative part.
Why the compost area deserves design attention:
The hidden compost:
- Most compost areas: behind a screen, at the back of the garden, visually apologised for
- The composting: the garden’s most important process, happening in its most neglected area
The designed compost area:
- Clearly organised bins
- The working element of the garden: visible but tidy
- The three-bin or two-bin system: the organisation that makes the process efficient
The autumn compost display potential:
The seasonal produce stored at the compost area:
- The squash and pumpkin store: the area near the compost often also used for storing harvested vegetables
- The winter squash in crates: beautiful when stacked
- The root vegetables in sand-filled boxes: the kitchen garden’s winter pantry
- The compost area as the harvest storage: the productive corner
The practical arrangement:
The harvest store:
- A simple shelved area in a corner near the compost
- Winter squash: stored here (cured and cool)
- The apples: in slatted crates (the air circulation essential)
- The garlic and onions: hung in bunches above (the traditional storage)
- The area: organised, functional, beautiful in its functionality
The hanging harvest:
- Onion and garlic braids hung from a hook
- The bunches of dried herbs beside them
- The stored squash on the shelf
- The area: the kitchen garden’s pantry visible in the garden
Cost breakdown:
- Storage shelving: $30–60
- Bins for the harvest storage (if needed): $0–30
- Total: $0–90
13. The Garden Lighting Check (The Autumn Preparation)

Checking, repairing, and expanding the garden lighting system before the autumn evenings begin — the cleanup task that makes the decorated garden visible after dark.
Why lighting is a cleanup task:
The autumn light issue:
- Dark at 5pm in October
- The lighting system that has been largely irrelevant through summer: now the primary way the garden is experienced after work
- The cleanup: the natural time to check and expand the system
The lighting inspection:
Every light in the garden:
- Functioning? (Replace any failed solar lights, bulbs, or fuses)
- In the correct position? (Some lights: moved by summer planting, now in the wrong place)
- On the correct timer? (The summer timer: incorrect for autumn — adjust for the earlier dusk)
- The colour temperature: warm? (The cool-white light that was installed: now the moment to replace)
The timer adjustment:
The most important five-minute autumn lighting task:
- Adjust all timers to come on 30–60 minutes earlier than the summer setting
- Dark at 5pm: the timer should activate by 4:30pm
- The garden: always lit when the evening begins
- The adjustment: done once for the season
The additional lights:
Adding to the system in autumn:
- The autumn garden: more areas lit (the seating area extended into October)
- Additional lanterns for the path
- String lights for the previously unlit pergola section
- The lighting expansion: the cleanup’s last task, the most enjoyable one
The display lights:
Lights on the decor itself:
- A spotlight on the entrance display (pumpkins, harvest materials)
- The display: visible and beautiful after dark
- The cleanup creating the display, the lighting completing it
Cost breakdown:
- Timer adjustments: $0
- Replacement bulbs or solar lights: $10–25
- Additional lanterns: $30–50
- Total: $10–75
14. The Saturday Morning Cleanup (The Everything-Together Session)

The complete autumn garden cleanup done as one organised Saturday morning session — the single focused effort that both completes the cleanup and sets up the autumn display.
Why one organised session beats the piecemeal approach:
The piecemeal cleanup:
- One task done on one weekend
- Another task done two weeks later
- The garden: half-cleaned for a month
- The display: never quite set up because the cleanup is never quite done
The single session:
- All tasks done in sequence in one morning
- The garden: completely cleaned and displayed by lunchtime
- The afternoon: spent in the finished garden
The session sequence:
8am — The assessment walk (20 minutes):
- Walk through the entire garden
- Note what is being kept, what is being cut, what is being gathered
- Identify any problems (disease, structures needing repair)
8:20am — The display material gathering (30 minutes):
- Before cutting anything: gather the display material
- The seed heads for indoor display (honesty, dried grasses, good seed heads)
- The best fallen leaves for pressing
- The harvest vegetables for the entrance display
- The trug full of material: set aside
8:50am — The main cleanup (2–3 hours):
- The spent annual removal
- The perennial cutback (leave the seed heads and grasses)
- The diseased material removal
- The cutting garden harvest and reset
- The spent summer container planting removal
11am — The mulch application (45 minutes):
- Dark bark mulch to all cleared beds
- 2–3 inch depth
- Around (not on) remaining plants
11:45am — The edge restoration (30 minutes):
- Re-cut all border edges
- The defining touch of the cleanup
12:15pm — The display setup (45 minutes):
- The gathered display material into vessels and arrangements
- The entrance display (pumpkins, harvest baskets, seasonal plants)
- The container refresh (autumn plants into cleaned pots)
- The path decoration (lanterns, seasonal pots)
1pm — The lighting check (15 minutes):
- Adjust all timers for the earlier dusk
- Check that all lights are functioning
- Add any additional lanterns planned
1:15pm — Done.
The garden after this morning:
- Cleaned and mulched borders
- Remaining plants specifically the beautiful and structural
- The entrance display set up
- The path decorated
- The lighting adjusted
- The display material arrangements made
The same garden: completely different by 1pm.
The cost of the Saturday morning session:
Materials needed:
- Dark bark mulch: $40–60 (delivery arranged in advance)
- Autumn seasonal plants (if any needed): $20–40
- Lanterns and lights (if expanding): $30–50
- Total: $90–150 for the full autumn setup
The Principle Behind All 14 Tips
The cleanup that produces the garden:
The conventional cleanup:
- Removes
- Reduces
- Ends the season
The cleanup-as-decor-prep:
- Curates (keeps the beautiful, removes the spent)
- Gathers (the display materials from the cleanup)
- Creates (the autumn garden from the autumn cleanup)
The difference:
- Not what is done — what is noticed while doing it
- The seed head cut for the compost: noticed as a display element first
- The fallen leaves raked: gathered as display material before composting
- The cut grasses: the display vessels before they are cleared
- The pumpkin harvested: the entrance display before it is eaten
The autumn garden that is cleaned and decorated at the same time:
- More beautiful than the summer garden that preceded it
- The cleanup: the setup for the most beautiful version of the garden year
Getting Started This Weekend
The two-hour minimum viable autumn cleanup:
First hour:
- The assessment walk: identify what is staying, what is going
- The display material gathering: fill a trug with what has display potential
- The spent annual removal: clear the clearly done
Second hour:
- Apply mulch to the cleared areas (even if only one bag)
- Re-cut the most visible edge (the path edge visible from the house)
- One adjustment to the autumn lighting (at minimum: adjust the timer)
The garden after two hours:
- Better than before
- One display arranged from the gathered material
- The most visible part cleaned and mulched
- The process begun
The principle: the cleanup and the decor prep are the same task. Begin the cleanup with the intention of making the garden more beautiful, not just cleaner. Every decision during the cleanup: in service of both.
The garden that emerges from this cleanup: the garden that most people do not realise is possible in October and November. The autumn garden as a destination rather than a season to get through.
That garden: made in one Saturday morning.